
This Weeks Harvest- In the Bag
Week of August 5th
The tomatoes are finally coming on strong with between 5 and 8 lbs per share this week. The cantaloupe have ripened as well and the watermelon are not far behind!
Carrots
Cantaloupe
Zucchini
Cucumbers
Sweet Peppers
Onions
Eggplant
Scallions
Tomatoes
Salad Mix
Week of July 15
Carrots

Hot week on the farm
Tomatoes
Zucchini
Eggplant
Salad Mix
Cucumbers
Onions
Green Beans
Basil
Bell Peppers
Hot Peppers
Turnips
Fennel
- 2 pounds green beans, trimmed to fit your jars (I had to trim mine a bit more after taking the photo you see above)
- 1 teaspoon cayenne pepper (I used nearly two, but tread carefully here if you’re not a spice person)
- 4 teaspoons dill seed (not dill weed)
- 4 cloves garlic
- 2 1/2 cups white vinegar (5%)
- 2 1/2 cups water
- 1/4 cup pickling salt (use a bit more if you’ve only got kosher)
Instructions
- Prep your canning pot by inserting a rack to keep your jars off the bottom of the pot, place pint jars in (wide-mouth pints work best here. A 12 ounce jelly jar is also nice, as it’s a bit taller than a standard pint and makes for less trimming) and fill it with water. Bring to a boil to sterilize while you prepare the rest of your ingredients.
- Wash and trim your beans so that they fit in your jar. If you have particularly long beans, your best bet is to cut them in half, although by doing so, you do lose the visual appeal of having all the beans standing at attending.
- Combine vinegar, water and salt in a medium saucepan and bring to a boil. While it’s heating up, pack your beans into the jars, leaving 1/2 inch headspace (distance between the tops of the beans and the rim of the jar). To each jar, add 1/4 to 1/2 teaspoon cayenne pepper, 1 clove of garlic and 1 teaspoon dill seeds.
- Pour the boiling brine over the beans, making sure to leave that 1/2 inch headspace. Use a plastic knife to remove air bubbles from jar by running it around the interior of the jar. Wipe the rims and apply the lids (which have been sitting in a small saucepan of water at a mere simmer for at least ten minutes in order to soften the sealing compound) and rings.
- Process for 5 minutes in a boiling water bath (remember that you don’t start timing until the pot has come to a roiling boil).
- These beans want to hang out for a least two weeks before eating, to thoroughly develop their flavor.
Notes
Adapted from So Easy to Preserve
Poach Salmon over a bed of onions, fennel, and tomatoes season with salt and pepper.
Refrigerator pickles are super easy to make and delicious – just search for dill refrigerator pickles and they’ll stay good in your fridge in any non-plastic container for a few months.
Alice Waters’ Ratatouille
Serves 6 to 8
- 1 medium or 2 small eggplant, cut into 1/2-inch dice
- 4 tablespoons olive oil, divided, plus more to taste
- 2 medium onions, cut into 1/2-inch dice
- 4 to 6 garlic cloves, chopped
- 1/2 bunch of basil, tied in a bouquet with kitchen twine + 6 basil leaves, chopped
- pinch of dried chile flakes
- 2 sweet peppers, cut into 1/2-inch dice
- 3 medium summer squash, cut into 1/2-inch dice
- 3 ripe medium tomatoes, cut into 1/2-inch dice
- Salt to taste
- Toss the eggplant cubes with a teaspoon or so of salt. Set the cubes in a colander to drain for about 20 minutes.
- Heat 2 tablespoons of olive oil in a heavy-bottomed pot. Pat the eggplant dry, add to the pan, and cook over medium heat, stirring frequently, until golden. Add a bit more oil if the eggplant absorbs all the oil and sticks to the bottom of the pan. Remove the eggplant when done and set aside.
- In the same pot, pour in 2 more tablespoons olive oil. Add onions and cook for about 7 minutes, or until soft and translucent. Add the garlic, basil bouquet, dried chile flakes, and a bit more salt.
- Cook for 2 or 3 minutes, then stir in peppers. Cook for a few more minutes, then stir in summer squash. Cook for a few more minutes, then stir in tomatoes.
- Cook for 10 minutes longer, then stir in eggplant and cook for 10 to 15 minutes more, until all the vegetables are soft. Remove the bouquet of basil, pressing on it to extract all its flavors, and adjust the seasoning with salt.
- Stir in the chopped basil leaves and more extra virgin olive oil, to taste. Serve warm or cold.
Grilled Zucchini Hummus
1 large zucchini (about 1 pound)
1/4 cup roasted tahini (sesame seed butter)
3 to 4 cloves garlic
1 tablespoon lemon juice
1 teaspoon cumin
1 teaspoon smoked paprika
1/2 teaspoon kosher salt
Heat a grill to high. Use an oil-soaked paper towel held with tongs to lightly oil the grill grates.
Trim the ends from the zucchini, then slice it in half lengthwise. If the seeds are large and watery, use a melon baller or small spoon to scrape out and discard most of the seeds from the center of each half. It’s not critical to get them all. If the inside of the zucchini appears firm and the seeds small, you don’t need to scrape them out.
Place the zucchini on the grill, cut side up, then reduce heat to low. Cook for 10 minutes, or until just lightly browned and starting to get tender. Set aside to cool.
When the zucchini has cooled enough to handle, place it in a food processor. Add the tahini, garlic, lemon juice, cumin, smoked paprika and salt. Process for 1 minute, or until very smooth.
The hummus can be served immediately, or chilled. The hummus will thicken slightly as it chills. Makes about 2 1/2 cups.
Per 1/4 cup: 45 calories; 30 calories from fat (67 percent of total calories); 3.5 g fat (0 g saturated; 0 g trans fats); 0 mg cholesterol; 3 g carbohydrate; 1 g sugar; 1 g fiber; 2 g protein; 110 mg sodium.
Week of July 8

Photo courtesy Kristen Henwood
Lettuce
Zucchini
Cucumbers
Green Beans
Carrots
Basil
Broccoli
Ailsa Craig Onion
Scallions
Eggplant
Fennel– Usually you either like it or you don’t. Strong and aromatic with a licorice flavor. I prefer it in the garden as a food plant for the butterfly’s particularly the Lepidoptera species including the swallowtail. Someone on staff must like it because it keeps getting planted even though it’s not on the crop plan. Ask Noah or Joanna for cooking advice.
Swiss Chard– Is one of the most nutritious vegetables second only to spinach and kale. It is in the beet family and it’s leaves are similar to beet greens but sweeter. Can be sauteed, boiled or steamed and is great in stir fry.
Nappa Cabbage– A Chinese cabbage similar to Bok Choi but with broader leaves and a sweeter flavor. Stands up to most cooking methods and can be grated, sliced, stir fry or spiced and pickled as in “kimchi” (recipe below)
Radicchio– Is in the chicory family and similar to escarole and endive. It has a somewhat bitter and spicy taste that mellows when it is grilled or roasted (see below)
Kohlrabi– Another staff favorite that keeps finding it’s way into the crop plan, Kohlrabi is a smaller denser cultivar of cabbage. It can be cooked or eaten raw. I prefer it raw in a crudites and I must admit it have grown more fond of it with each passing season. It has a sweet flavor that is similar to a cross between an apple and a Hakurei turnip- better than it sounds.
Kimchi
Two quarts
Kimchi is spicy fermented cabbage similar to sauerkraut.
- 1 large Chinese or Napa Cabbage
- 1 gallon (4l) water
- 1/2 cup (100g) coarse salt
- 1 large head of garlic, peeled and finely minced
- one 2-inch (6cm) piece of fresh ginger, peeled and minced
- 1/4 cup (60ml) fish sauce
- 1/3 cup (80ml) chili paste or 1/2 cup Korean chili powder
- 1 bunch scallions, cut into 1-inch (3cm) lengths
- 1 medium head kohlrabi, peeled and grated
- 1 teaspoon sugar or honey
1. Slice the cabbage lengthwise in half, then slice each half lengthwise into 3 sections. Cut away the tough stem chunks.
2. Dissolve the salt in the water in a very large container, then submerge the cabbage under the water. Put a plate on top to make sure they stay under water, then let stand for 2 hours.
3. Mix the other ingredients in a very large metal or glass bowl.
4. Drain the cabbage, rinse it, and squeeze it dry.
5. Mix it all up.
6. Pack the kimchi in a glass jar large enough to hold it all and cover it tightly. Let stand for one to two days in a cool place.
7. Check the kimchi after 1-2 days. If it’s bubbling a bit, it’s ready and should be refrigerated. If not, let it stand another day, when it should be ready.
8. Once it’s fermenting, serve or store in the refrigerator.
Grilled Radichio
The bitterness of Radicchio is mellowed by grilling and the balsamic adds a distinct sweetness that makes this a great vegetable side dish.
Ingredients:
- 1 head radicchio
- 1 – 2 tsp. olive oil
- Sea salt
- 1 – 2 tsp. balsamic vinegar
Preparation:
- Preheat the grill. Trim and browned edges from the stem of the radicchio. Cut radicchio into quarters. Rub or brush entire radicchio quarters with oil.
- Set radicchio one cut-side down on the grill. Cook until edges are well browned, about 4 minutes. Turn to other cut-side, sprinkle cut-side with salt, and cook until entire radicchio is nicely browned and wilted, about 4 more minutes.
- Remove radicchio from grill and drizzle with balsamic vinegar. Serve hot, warm, or at room temperature
Week of July 1
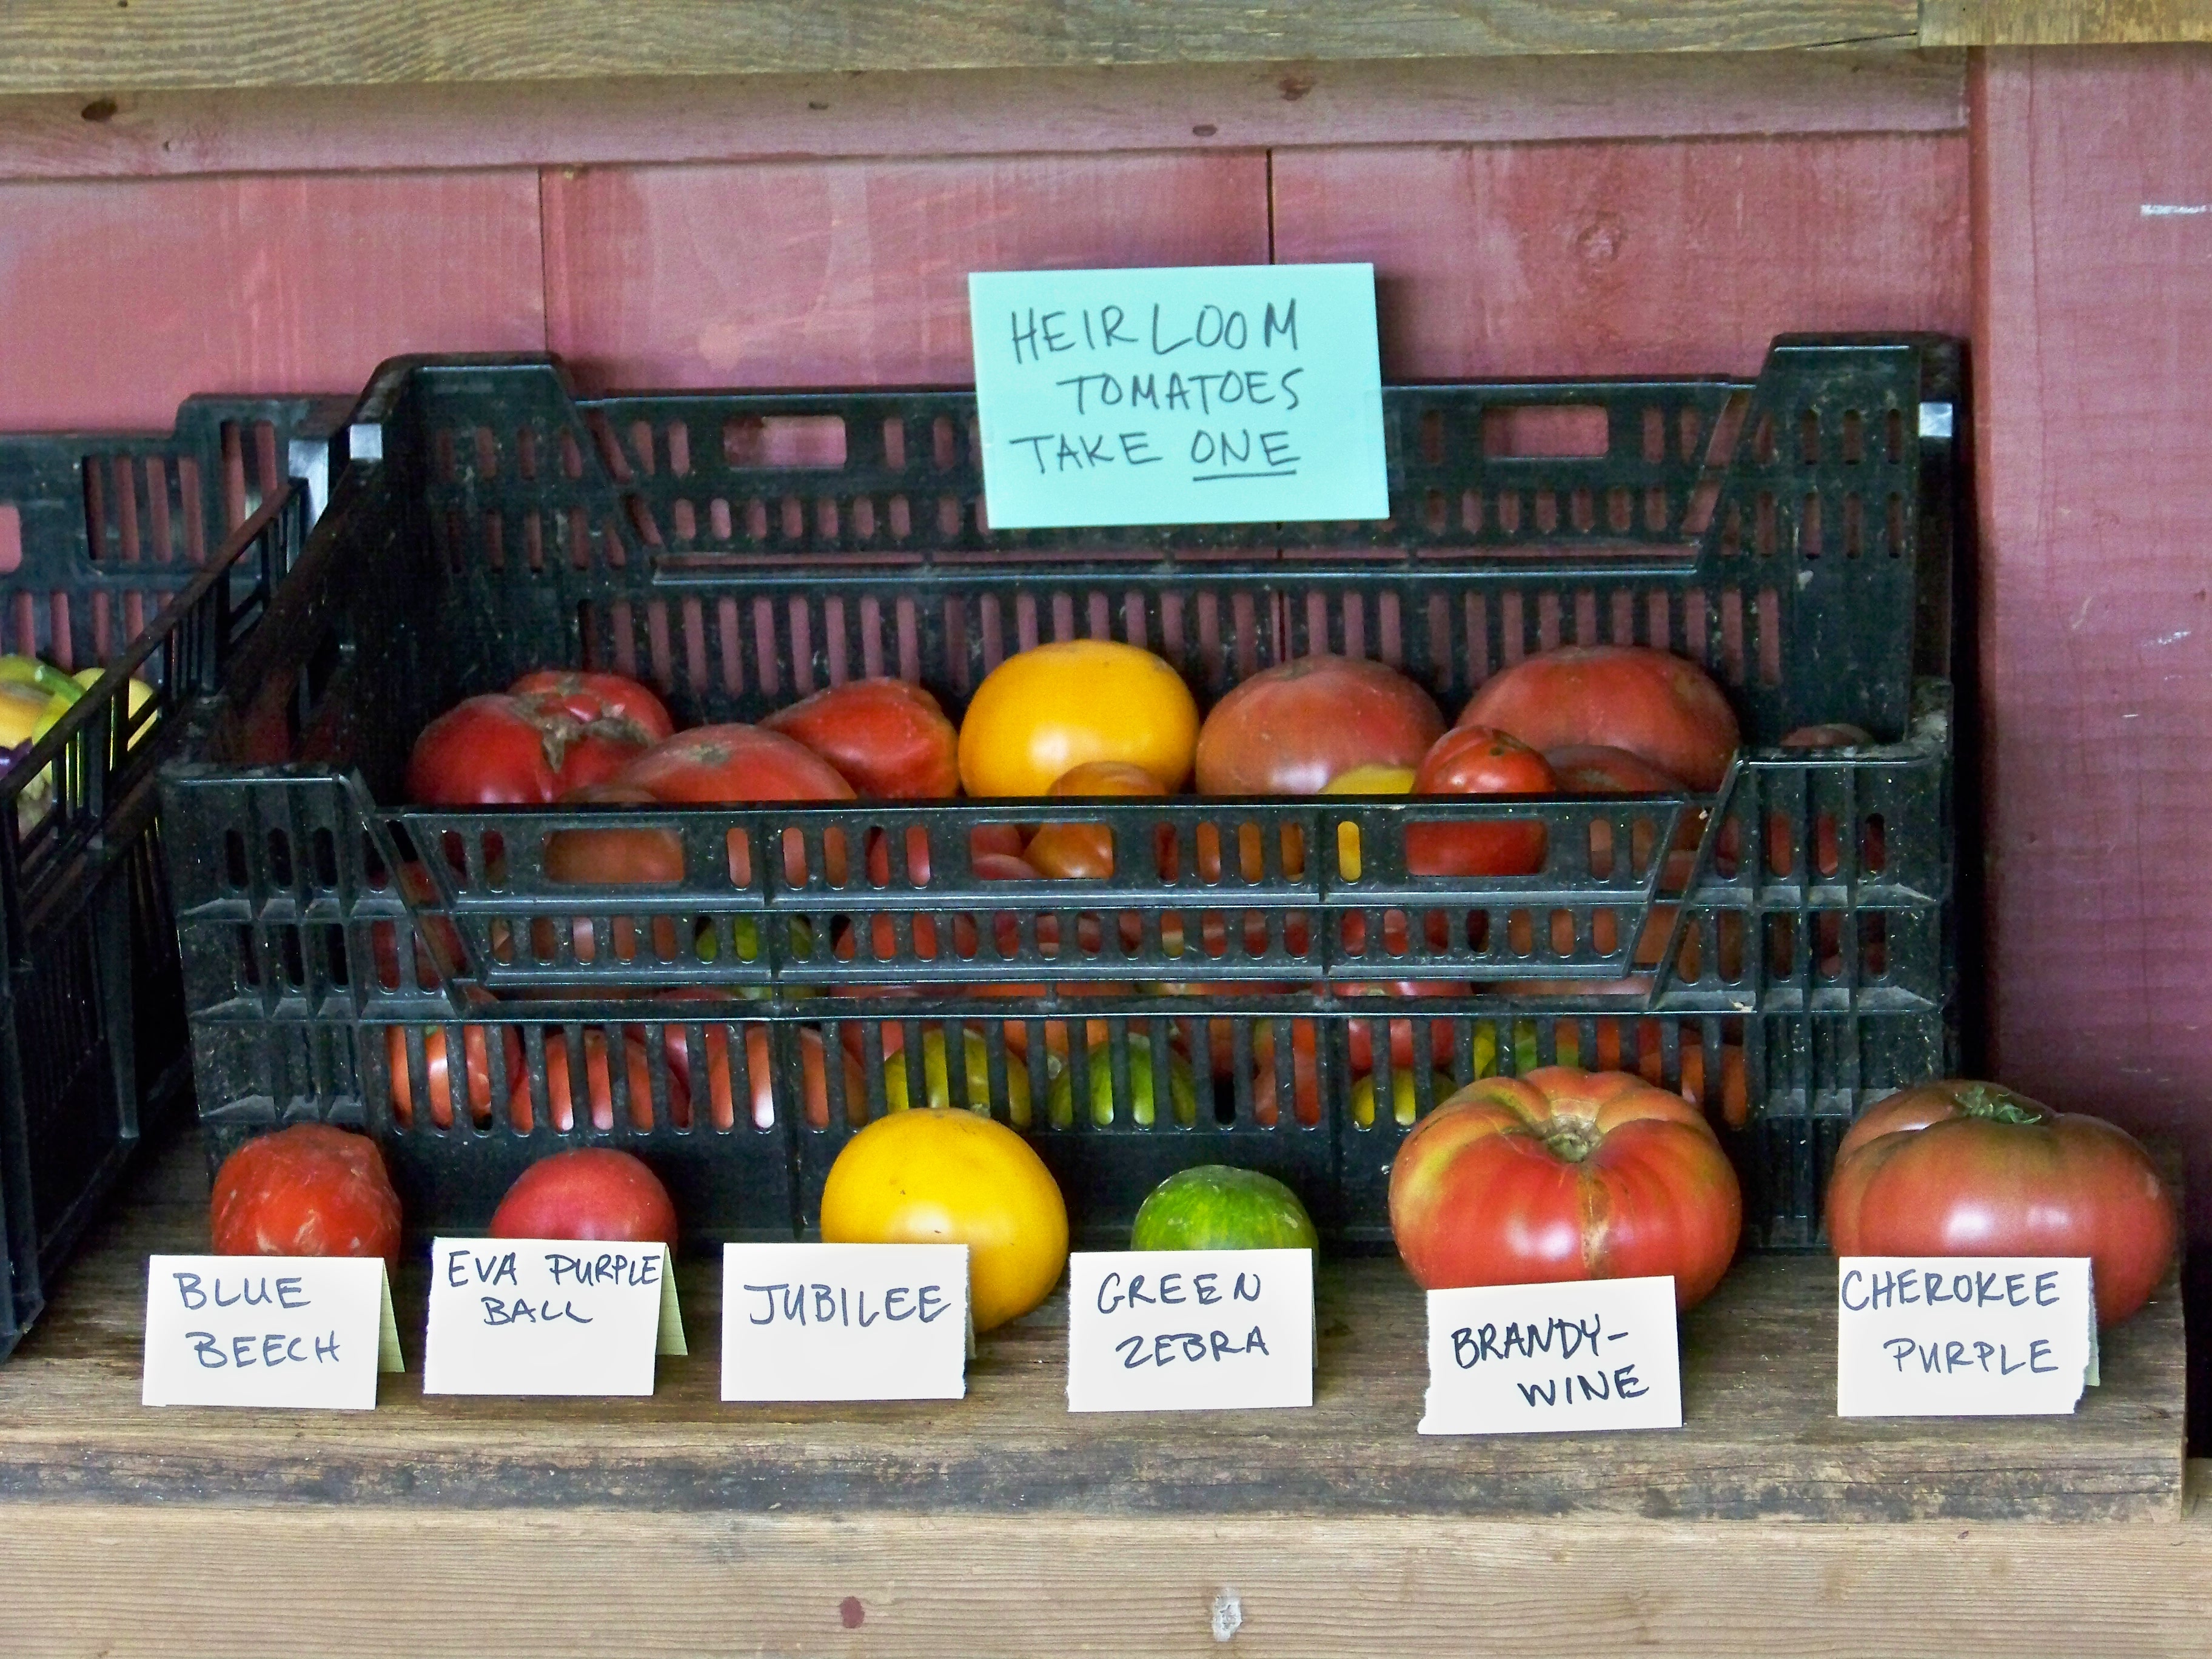
Tomato(es)- We are hoping for more than one a share but we will be happy with any we can get in time for the fourth of July weekend. Don’t there will be 5 to 10 lbs a share within a couple of weeks
Cucumbers- These early cukes are a pickling variety that is very good in salads as well
Carrots
Lettuce Mix
Beets– can be boiled or roasted. Boil; 1 1/2 hours until tender all the way through/ Roasted; single layer salted 350 degrees for 1 1/2 hours
Escarole-Escarole, a member of the chicory family, has wide stems and curly leaves. Like other chicories, it has a bitter flavor, though somewhat less so than endive. Though it can be eaten raw in salads, its hearty leaves benefit from cooking and is delicious with bacon, sausage, and added to white bean soups. See recipes below
Peas- Sugar snap peas can be eaten whole in the pod or shelled if the peas are large. Excellent raw or in salads.
Zucchini- Yellow and green
Pac Choi-Closely related to bok choi, this leafy green Chinese vegetable belongs to the cabbage family (though tastes nothing like cabbage!). It has long green, slightly ribbed leaf stalks and soft oval green leaves. The leaves and stems are best suited to brief stir-frying or steaming to retain their mild flavor.
Cabbage- Tastes nothing like Pac Choi
Basil
Turnips
Week of June 24

Scallions
Beets– can be boiled or roasted. Boil; 1 1/2 hours until tender all the way through/ Roasted; single layer salted 350 degrees for 1 1/2 hours
Escarole-Escarole, a member of the chicory family, has wide stems and curly leaves. Like other chicories, it has a bitter flavor, though somewhat less so than endive. Though it can be eaten raw in salads, its hearty leaves benefit from cooking and is delicious with bacon, sausage, and added to white bean soups. See recipes below
Peas- Sugar snap peas can be eaten whole in the pod or shelled if the peas are large. Excellent raw or in salads
Hakurei Turnips- Salad turnips that can be eaten raw or roasted like the beets.
Scallions
Carrots
Arugula
Kale- (see recipe below)
Zucchini- Yellow and green
Pac Choi-Closely related to bok choi, this leafy green Chinese vegetable belongs to the cabbage family (though tastes nothing like cabbage!). It has long green, slightly ribbed leaf stalks and soft oval green leaves. The leaves and stems are best suited to brief stir-frying or steaming to retain their mild flavor.
Cabbage- Tastes nothing like Pac Choi
Basil
Sunflower Sprouts- Last serving of these crunchy, delectable shoots
Warm Escarole Salad with Mustard Vinaigrette
Escarole is a variety of endive with substantial, ruffly leaves. It’s great for braising, and also good for salads, especially warm salads, where it can be tenderized by gentle heat. You could probably make this in a sauté pan over low heat, but I like the tossing room I get by putting a large metal bowl over a pan of simmering water (like a double boiler). If you can’t find escarole, first tell your grocer you want some and then go ahead and make the salad with escarole’s frizzier cousin frisée, or with spinach, which will take less time to wilt. It is difficult to say exactly how much escarole to purchase, because heads of the escarole can vary greatly in size, and in quality. You will want about enough salad to leave 1 cup of trimmed leaves per person. Go ahead and buy an extra head if most of the leaves seem very dark green and tough.
Escarole salad:
About 4 cups of trimmed escarole leaves (or frisée, or spinach, though if you use spinach, use a little more)
Salt and pepper to taste
Basic Citrus-Shallot Vinaigrette (about 3 tablespoons)
1 teaspoon Dijon mustard
To trim and clean the escarole:
Pull off any dark green leathery leaves on the outside of the head. The inner leaves may need their dark green tips trimmed, too. Wash these leafy trimmings, and save them for the next time you’re braising kale or chard or making a soup. Cut away the core of the escarole and discard it. Wash the pale leaves–you’ll use these for the salad. (My preferred method of washing salad greens: Fill a large bowl with cold water, place the greens in it, and swish them around. Let sit for 10 minutes, and then lift the greens out of the water rather than pouring the water out so that any sand stays at the bottom of the bowl.) Dry them in a salad spinner or with a clean kitchen towel.
When you’re ready to make the salad:
Find a large heatproof bowl (metal’s easiest) and a pot onto which it can fit like a double boiler. Heat 2 inches of water in the pot and hold it at a very gentle simmer. Place the vinaigrette in the bottom of the bowl, and whisk in the mustard. Place the bowl over the simmering water. Add the escarole, season with salt and pepper, and toss the salad over the heat until it is a little wilted, but not totally sodden. Adjust the seasoning and serve on warm plates.
-Recipe by Sara Dickerman
Read More http://www.bonappetit.com/recipes/food-lovers-cleanse/warm_escarole_salad#ixzz2XGAE2VYl
Escarole and White Bean Soup with Rustic Croutons
- 1/4 cup extra-virgin olive oil
- 1 medium onion (6 oz.), diced
- 2 oz. very thinly sliced pancetta, diced (about 1/2 cup)
- 1 Tbs. minced garlic
- 1 medium to large head escarole (about 14 oz.), trimmed of outer leaves, 2 inches of root end cut off, leaves sliced across into 3/4-inch wide strips (to yield about 9 to 10 cups), thoroughly washed
- 1 tsp. coarse salt
- Freshly ground black pepper
- 2 cups low-salt chicken stock (canned is fine, but don’t use low-fat varieties, which I find have an off flavor)
- 1 cup cooked cannellini, navy beans, or other white beans (I use canned—Goya brand—drained)
- 1 Tbs. fresh lemon juice
- 1/4 cup grated parmigiano reggiano
- 2 cups Rustic Croutons (see below)
Heat the olive oil in a 4-qt. low-sided soup pot or Dutch oven over medium to medium-high heat. Add the onion and pancetta and sauté until the onion is softened and both are browned, about 12 minutes. Add the garlic, stir, and sauté until fragrant, 30 seconds to 1 minute. Add the escarole and stir thoroughly to coat the leaves (and to deglaze the pan slightly with their moisture). Season with 1/2 tsp. of the salt and a few grinds of fresh pepper. Add the stock, stir well, and bring to a boil; cover the pot, lower to a simmer, and cook 8 to 10 minutes. Uncover the pot, add the beans, and simmer another 2 to 3 minutes. Add the lemon juice and turn off the heat. Ladle the soup into four shallow soup bowls and top each with 1 Tbs. of the cheese and a quarter of the croutons.
Rustic croutons
Heat 2 Tbs. extra-virgin olive oil in a nonstick skillet over medium-high heat. Add 2 cups (lightly packed) 3/4-inch cubes of bread, cut from a good, airy, crusty loaf like ciabatta. Stir to coat the cubes with the oil, season with salt, and sauté, stirring constantly, until crisp and browned on most sides, 2 to 4 minutes.
Susie Middleton
Fine Cooking Magazine
Kale Chips
About six servings
Remove the tough stems from the kale and wash and spin dry the kale thoroughly. This recipe can easily be doubled. Just be sure to rotate the baking sheets in the oven for even cooking.
As mentioned, some people cook them at a higher temperature, California-style, which makes a crunchier, drier kale chip than those cooked at lower temperatures. I like them both ways. If you wish to roast them in a 425ºF (218ºC) oven, they’ll take about 12 minutes to cook.
- 6 to 8 cups (140 to 200 g) kale leaves; if large, tear them into bite-sized pieces
- 1 tablespoon olive oil
- flaky sea salt or fleur de sel
1. Preheat the oven to 350ºF (180ºC.)
2. Put the kale on a baking sheet and drizzle with the olive oil, then massage it into the leaves.
3. Spread the kale leaves in an even layer on the baking sheet and put in the oven. After about 5 minutes, use a spatula to separate any leaves of kale that are clumping together.
4. Continue cooking the kale for about 20 minutes, until the leaves are crisp. Remove from the oven and sprinkle fairly generously with salt.
David Lebovitz
Week of June 17
The peas and zucchini have arrived! We know spring is nearly gone and summer is almost here when the peas and zucchini reach maturity.
Peas 
Zucchini
Beets
Cabbage
Salad Mix
Sunflower Shoots
Scallions
Kale
Turnips
Fennel
Chocolate Beet Cake
Ingredients
- 4 medium beets, trimmed, peeled, and cut into 2-inch chunks
- 2 cups all-purpose flour
- 1 1/2 cups sugar
- 1/2 cup unsweetened Dutch-process cocoa powder
- 1 1/2 teaspoons baking soda
- Salt
- 2 large eggs
- 3/4 cup warm water
- 1/4 cup safflower oil
- 1 teaspoon pure vanilla extract
- Vegetable oil cooking spray
- Chocolate Frosting (optional)
Directions
- Cover beets with 2 inches water in a pot. Bring to a boil. Reduce heat, and simmer until very tender when pierced with the tip of a sharp paring knife, about 30 minutes. Drain. Puree beets in a food processor until smooth.
- Preheat oven to 350 degrees. Whisk together flour, sugar, cocoa powder, baking soda, and 3/4 teaspoon salt in a large bowl. Whisk in eggs, water, oil, vanilla, and 1 1/4 cups beet puree (reserve remaining puree for another use).
- Coat a 9-inch round cake pan (3 inches deep) with cooking spray. Line bottom with parchment, and coat with spray. Pour batter into pan. Bake until a toothpick inserted into the center comes out clean, about 45 minutes. Let cool in pan on a wire rack for 20 minutes. Turn out cake from pan, and discard parchment. Let cool completely, right side up.
- Trim top of cake using a serrated knife to create a level surface. Transfer cake, cut side down, to a platter. Pour chocolate frosting over the top, and let set, about 30 minutes.
Courtesy Martha Stewart Living
Week of June 10
We are moving from the greens and into the root vegetables with the first beets, Hakurei salad turnips and radishes being featured along with some incredible broccoli and fennel.
Beets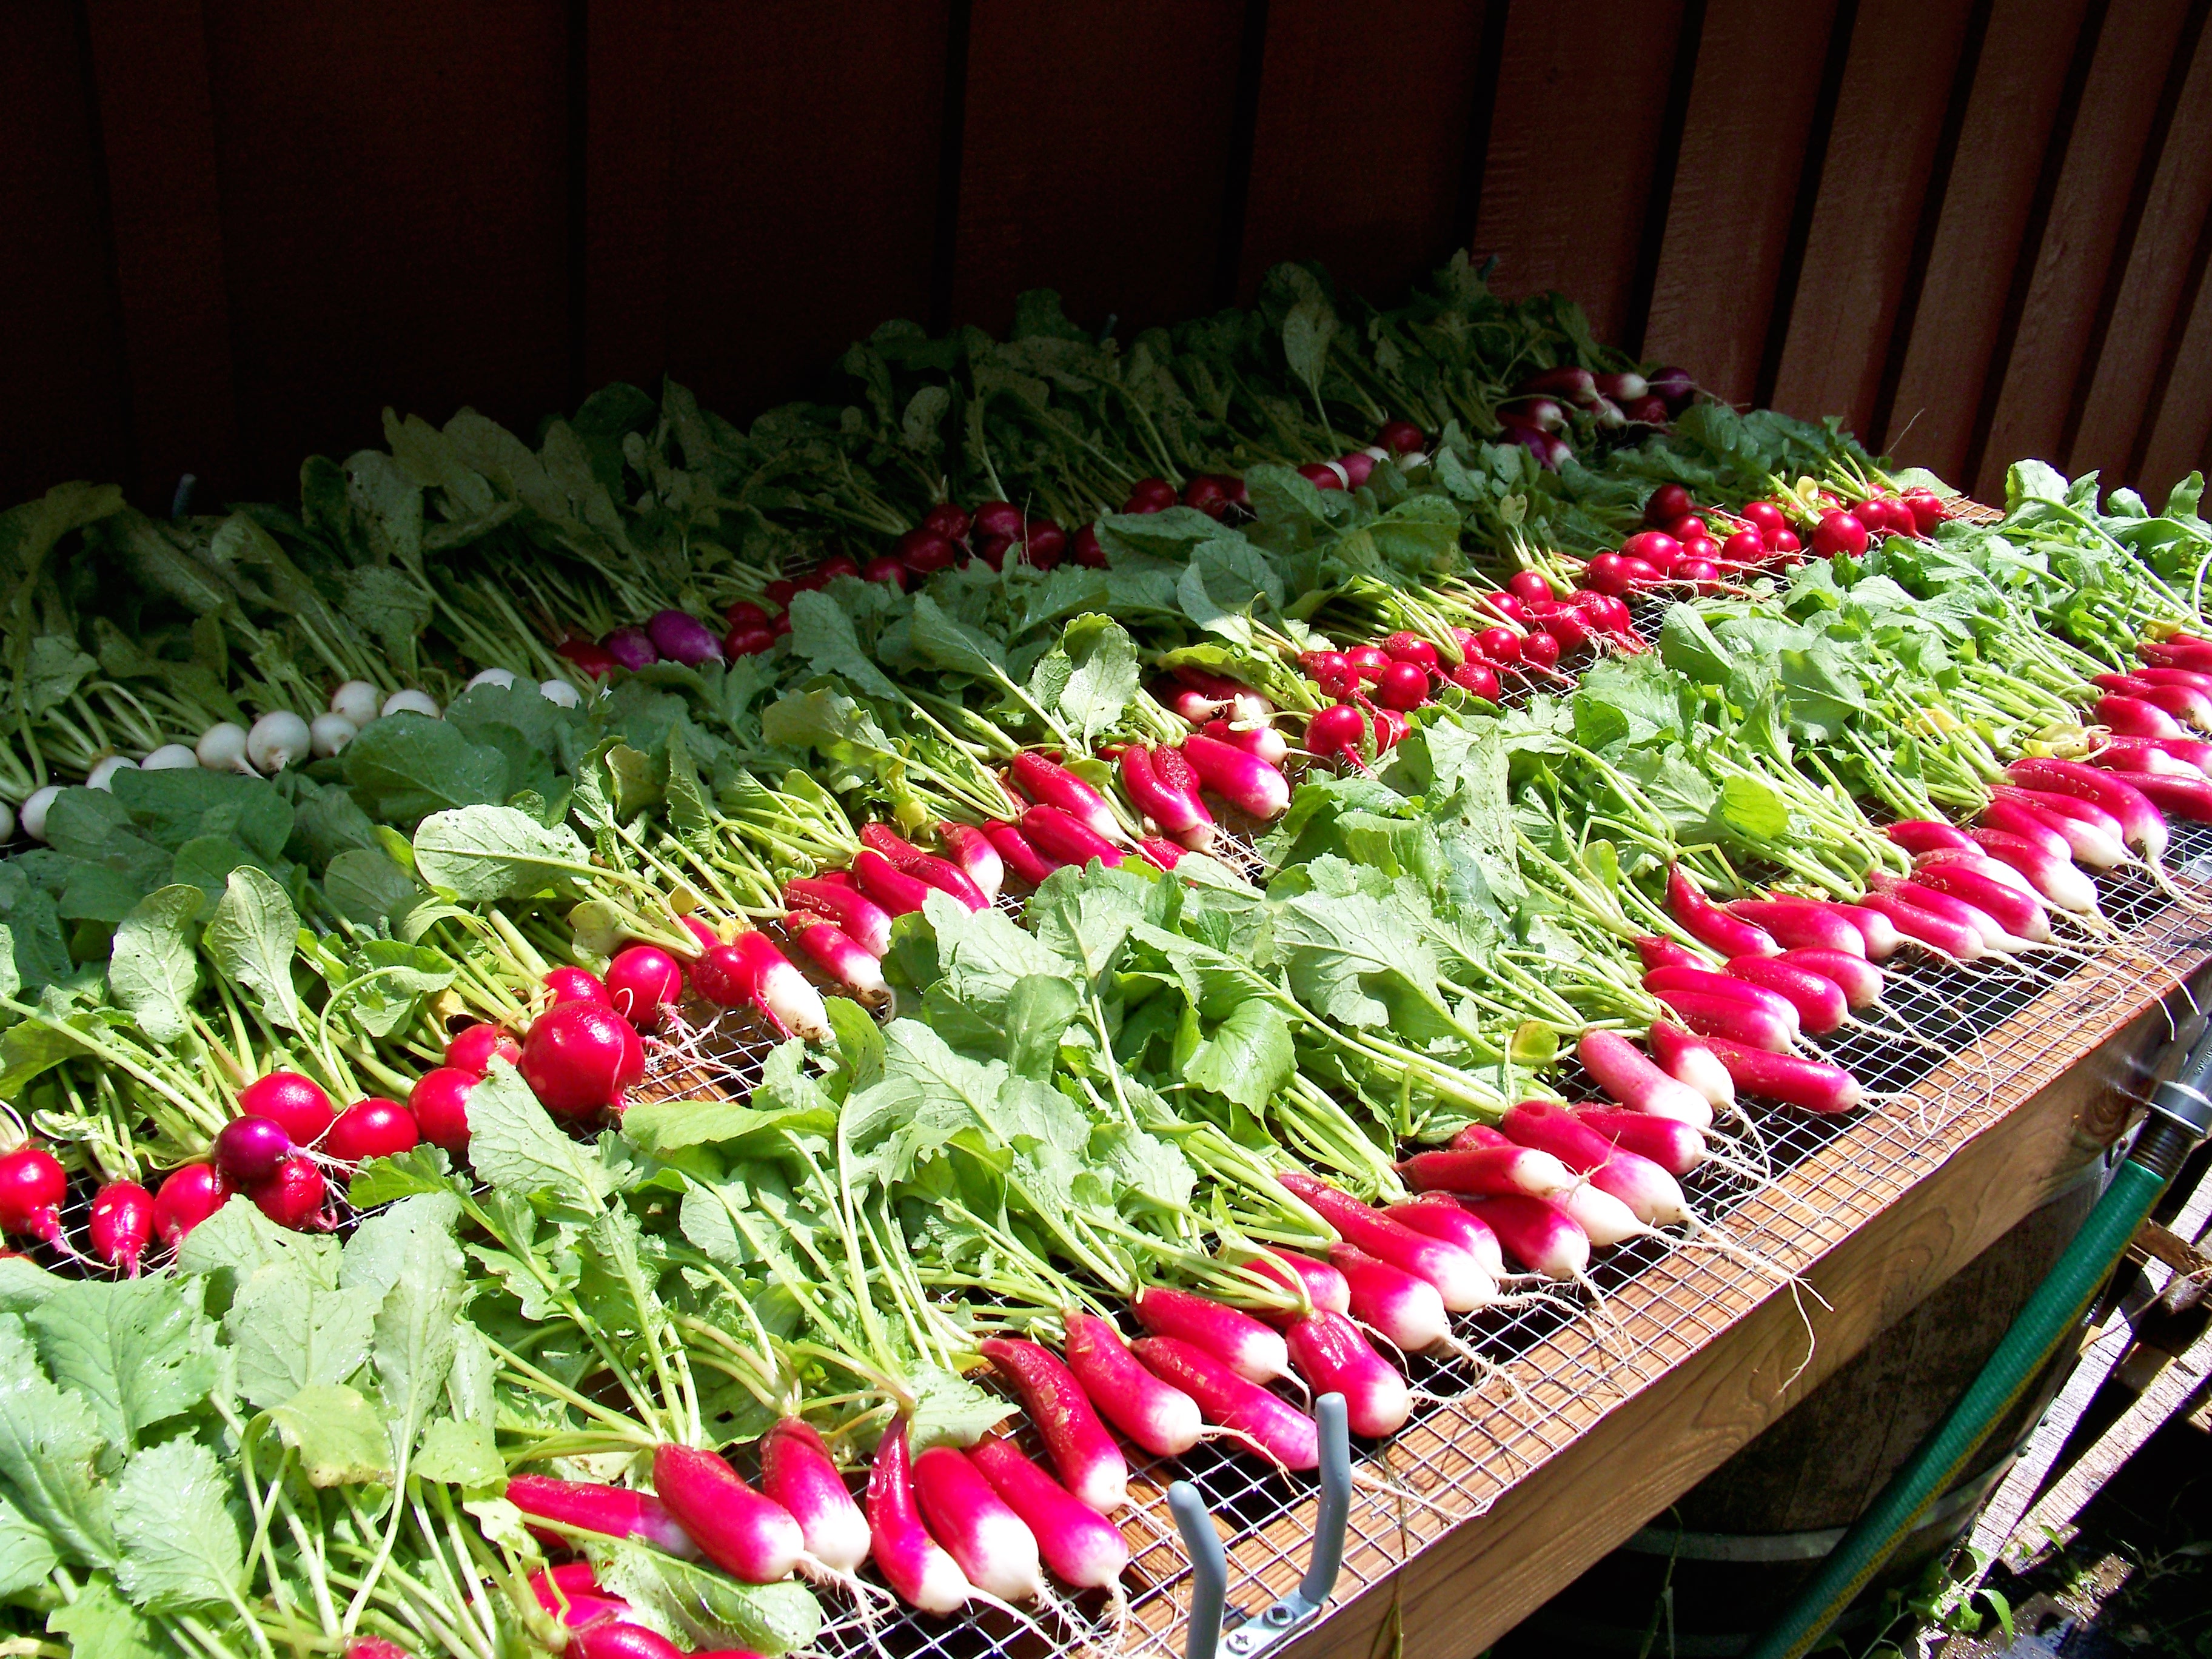
Scallions
Napa Cabbage
Hakurei Turnips
Winterbor Kale
Sunflower Sprouts
Fennel
Head lettuce
Broccoli
Radishes
Hakurei Salad turnips can be eaten raw but are outstanding when prepared using the recipe below;
Glazed Hakurei Turnips
Hakurei turnips are a small, delicately flavored Japanese variety that will win over even the harshest turnip critic. If you can’t find them, use another small turnip like the Tokyo, or substitute with red radishes.
Ingredients
- 1 bunch baby hakurei turnips, baby turnips, or red radishes (about 1 pound), trimmed, greens reserved
- 1/4 stick unsalted butter
- 1 tablespoon honey or sugar
- Kosher salt
Preparation
-
Place turnips in a large skillet; add water to cover turnips halfway. Add butter, sugar, and a large pinch of salt; bring to a boil. Cook, stirring occasionally, until liquid is syrupy and turnips are tender, about 15 minutes. (If turnips are tender before liquid has reduced, use a slotted spoon to transfer turnips to a plate and reduce liquid until syrupy. Return turnips to pan and stir to coat well.) Can be made 4 hours ahead. Let stand at room temperature. Rewarm before continuing.
-
Add turnip greens to skillet and cook over medium heat, stirring occasionally, until just wilted, 2–3 minutes. Season with salt.
Adapted from Bon Appetit

Leave a comment